Photography by Marshall Hinsley
With the arrival of spring in North Texas comes the beginning of the warm-season crop cycle. it’s the time to grow tomatoes, peppers, squash, okra, melons and everything else we associate with hot days of summer that are just around the corner.
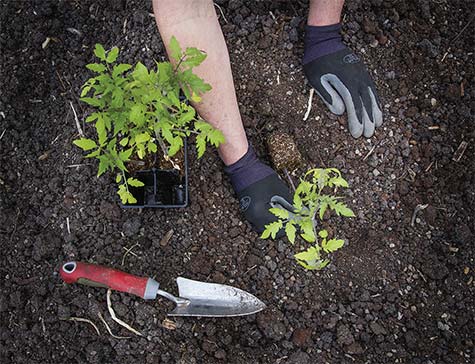
Experienced gardeners know that all it takes to get a vine-ripe tomato, a few sprigs of basil or a bouquet of zinnias fresh from your own garden is to dig up a little soil, plant seeds or seedlings and water everything when the soil feels dry. anyone can master these basics in one season, and doing no more than this can yield an adequate harvest from your first try.
It’s what you do beyond the basics that’s the difference between an acceptable tomato and a juicy, delicious slicer, or a few meager flowers and a plot full of beauty and color that attracts birds, bees and butterflies from miles around. From adding essential nutrients to the soil to automating your watering schedule, you can implement simple techniques and projects that improve your results.
Here’s a look at a few things you can do to enjoy a better harvest with less effort.
BED PREPARATION
To get our warm-season crops underway, we must first prepare the soil where they’ll grow. Whether you decide to till up a patch of ground in the backyard or build a raised bed garden with wooden frames and mulched pathways, what you need to add to the soil is about the same.
Native soils are suited well for growing native grasses, trees and wildflowers. But for our modern day cultivars domesticated thousands of years ago and bred continuously to satisfy our urge for sweet, plump, juicy and altogether huge produce, the typical patch of dirt we dig up in our backyard is anemic.
There are a little over a dozen elements that plants need to grow, but we only need to help North Texas soils with a few key nutrients. By adding organic soil amendments to our soil, we can enjoy thriving crops and beautiful floral displays without burning up the soil with too much nitrogen or watching our investment wash away in the next rain shower.
FIRST, PREPPING THE SOIL:
If you’re tilling a small patch of ground, make sure the soil is aerated and loose to a depth of about eight inches with a rototiller, a shovel or a spade fork.
If you plan to build a raised garden bed, first cultivate the soil below where the bed frame will be. Then fill the frame with compost, raised bed mix or topsoil.
Once you’ve loosened the soil in a traditional garden patch or a raised bed, you’ll be able to add soil amendments and mix them in easily.
WHAT TO ADD:
A Source of Nitrogen—From composted animal manures or alfalfa meal, nitrogen greens up plants and sparks rapid growth.
Soft Rock Phosphate—Phosphorous is a component of DNA and RNA. Soft rock phosphate is an organic source of phosphorous, available from most garden centers. It’s slow to break down, so it stays put in the garden once it’s applied and therefore won’t pollute groundwater sources like synthetic fertilizers do.
Sul-Po-Mag—A pelleted product known as Sul-Po-Mag adds three essential nutrients to the soil. First, there’s sulfur which is an essential plant nutrient used in the formation of amino acids and protein. It also lowers the pH of the soil a tad, which is a plus for most North Texas gardens. Second, it contains potassium which affects the flavor, size, color and shape of produce. Third is magnesium, a building block for chlorophyll.
Trace Minerals—Replacing the full range of elements and minerals found in native soils but lost through intensive farming practices, products containing glacial rock dust or Texas green sand add micro-nutrients back to the soil, improving a plant’s nutrient content and its ability to endure drought and pests.
Expanded Shale and Lava Sand—Not a source of nutrients, expanded shale and lava sand aid plants by improving the soil’s tilth. Expanded shale is a porous rock product that stores and releases moisture, right when plants need it between rain showers. Lava sand loosens heavy clay, making it more easily worked and aerated, thus improving root health.
DRIP IRRIGATION

If your garden is no bigger than a parking spot, a water hose can and a few minutes every other day is about all you need to keep your soil moist. Branch out a little bigger and the task of watering can become your new part-time job.
To tame this time-consuming chore, you may want to put together your own drip irrigation system, which will not only save you time but money too as water is dripped efficiently right where it’s needed with not a drop wasted.
More than just a way to reduce your workload, drip irrigation is a better way to keep your garden green because plants thrive with even moisture; hand watering is so hit-and-miss. Connect the main half-inch tubing to a sprinkler timer and you can even leave for vacation knowing that your garden will fare just fine in your absence as water reaches each plant through an automated lifeline tied directly to your outdoor spigot.
A basic drip irrigation system involves little more than a length of half-inch plastic tubing attached to an outdoor water faucet and winding around your garden plants. Plugged along the tubing so that they drip near the rootzone of each plant are drip emitters, which are small, plastic attachments that plug into the main tubing anywhere you choose.
Drip emitters are what make a drip irrigation system far more advanced than a mere soaker hose—or worse: a water-wasting lawn sprinkler. Because they’re engineered to disperse specific quantities of water, they take the guesswork out of determining how much moisture each plant gets. As long as there’s pressure in the main tubing, the attached emitters drip as little as half a gallon per hour or as much as 10 gallons each, depending on which ones you’ve installed.
No advanced skills are needed to construct your own system either. If you can cut a flexible hose with a utility knife without hurting yourself, you have what it takes to be a pro.
When you’re just getting started with drip irrigation, your safest bet is to buy a kit such as the Mister Landscaper Garden Drip Kit which has everything you need to build a system capable of watering up to 100 feet of rows, or the Dig Patio Drip Watering Kit which is designed for an urban garden on the balcony. With these kits, once you feel your way around how the faucet attachment connects to the half-inch tubing, and how easy it is to plug emitters in wherever you want them, you’ll be familiar enough to expand your system, either by adding more kits or buying the individual parts and accessories you need to customize your system to your garden.
MULCHING
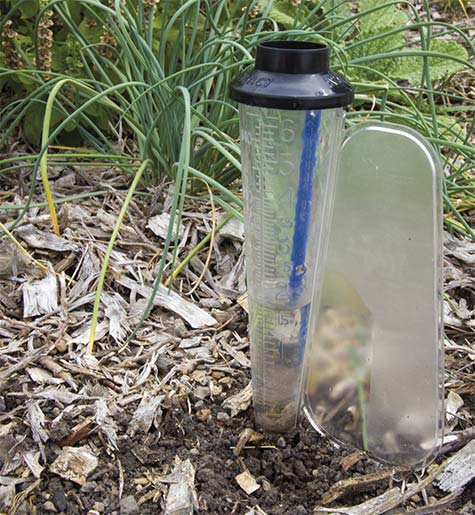
Like flossing, you can skip the whole mulching chore, but sooner or later you’ll pay for your neglect.
Covering bare soil in your garden may be second only to fertilizing the soil for ensuring that your plants flourish. Mulching slows down how much soil moisture evaporates away, which keeps your plants’ water supply more even between waterings.
Optimum soil temps for plants are warm, but not hot. Bare soil can reach over 120 degrees Fahrenheit, which can dry it out and kill plants and the beneficial fungi and microorganisms that feed plants with their metabolic byproducts. On the other hand, mulched soil can maintain a healthy temp in the 70s and 80s even on the hottest, sunny days.
Weeds are also suppressed by heaping mounds of leaves, chipped wood or compost over your topsoil. A layer of mulch reduces your workload in the weeks and months ahead.
What you use as mulch is up to you and what resources are available to you. For some, it’s bags of leaves that their neighbor threw away last fall. Thoroughly composted kitchen scraps are an option, and lawn clippings as long as they’re not contaminated with herbicides.
Bagged mulches from the garden center are convenient if you don’t mind paying a premium for what amounts to a free resource that’s been packaged up. Cardboard from discarded shipping boxes is free and makes a hardy mulch. Whatever you use should be biodegradable and free from chemical contaminants while being loose and airy so that water and air easily penetrate it.
The goal with any material you use is to cover the topsoil around plants and between garden rows so that the dirt is totally shaded, but not cut off from the air and rainfall—hence why not to use plastic sheeting. Layering the mulch up by several inches additionally benefits plants by insulating the soil from temperature swings throughout the day.
GARDENING APPS
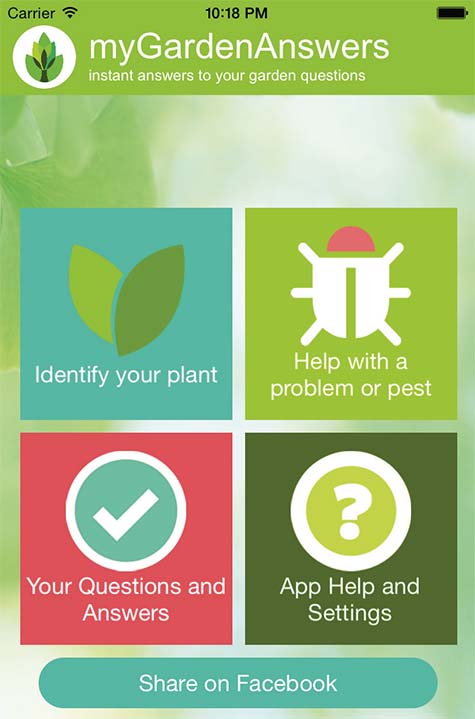
Like your own digital horticultural consultant, our favorite gardening apps guide you through the whole process of growing your own grub.
Here’s what we like.
Garden Time Planner by Burpee—Provides additional plant info on hundreds of garden plants and creates a checklist of what to plant at what time, based on your location. Also includes local weather info, links to how-to videos and tips from professional growers. Free for iPhone, iPad and Android devices.
Sprout It—Offers a custom planting calendar and gives you important alerts like when an unexpected frost threatens your crops. Includes a plant database and tips on common problems, how to harvest and recipes to help you put away your bounty. Free for iPhone and iPad.
Garden Plan Pro—Whether you’re a traditional row gardener, a raised bed gardener or a square-foot gardening practitioner, Garden Plan Pro can help you design a beautiful and productive garden. Has advice on plant spacing, crop rotation and successive sowing for the plants you choose. $7.99 for iPhone and iPad.
Garden Answers Plant Identifier—If you’ve ever had a mystery plant pop up in your garden, Garden Answers Plant Identifier will help you ID it. Simply snap a photo of the plant and upload it, and advanced image recognition technology will match it to one of 20,000 plants in the app’s database. Also helps you identify plant diseases and insect infestation while offering the option to interact with real garden experts. Free for iPhone, iPad and Android devices.
PLANTING GUIDE
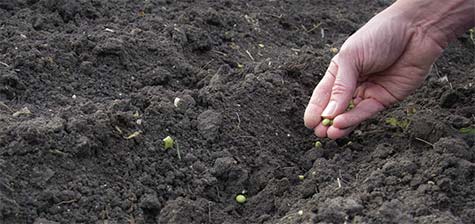
With more than 220 frost-free days from March to November, the climate in North Texas is perfectly suited for backyard gardening. Our extra long growing season accommodates everything from quick-growing lettuces and radishes that mature in as little as six weeks to watermelons and squash that can take as long as 100 days from the time you sow the seed to day you harvest your first fruit.
A key to getting the most from your garden is timing. Tender crops such as fresh greens grow well in the mild weather of spring and fall, whereas melons, tomatoes and peppers thrive in hot summer months. Timing each crop to the right time of the year ensures that whatever you grow gets the full benefit of the season.
To start your crops at the right time, you can dive into an in-depth study of each cultivar, learn its optimum germination temperature and moisture needs while taking into account our average monthly number of daylight hours, soil temperatures and typical precipitation in order to arrive at the best time to sow your seeds in the garden. Or, you can consult just about any planting guide that boils all these factors down to a corresponding date on the calendar—all you have to do is to plant when it says to.
Online resources such as Texas A&M Agrilife Extension’s Spring Planting Guide for Vegetable Crops and The Old Farmer’s Almanac Gardening Calendar off er guidance on a wide variety of crops. Here’s a brief look at when to start some of the most popular garden crops in North Texas this spring, and when to expect a harvest:
| CROP | WHEN TO PLANT/SOW | SEED OR TRANSPLANT |
DAYS UNTIL EXPECTED HARVEST |
| Beans | Mar 5 – May 1 | Seed | 50 |
| Cantaloupe | Mar 15 – May 1 | Seed | 85 |
| Carrots | Mar 1 – Apr 30 | Seed | 70 |
| Corn | Apr 15 – May 1 | Seed | 80 |
| Cucumbers | Apr 1 – May 1 | Seed | 55 |
| Eggplant | Mar 15 – May 30 | Transplants | 60 |
| Kale | Mar 1 – 31 | Transplants | 30 |
| Leaf Lettuce | Mar 1 – Apr 15 | Seed | 45 |
| Peppers—Hot or Sweet | Mar 15 – May 30 | Transplants | 70 |
| Radishes | Mar 15 – Apr 15 | Seed | 25 |
| Southern Peas | Mar 25 – May 20 | Seed | 60 |
| Squash—Summer | Apr 1 – May 15 | Seed | 42 |
| Sweet Potatoes | Apr 15 – June 1 | Slips | 90-120 |
| Tomatoes | Mar 15 – Apr 10 | Transplants | 60 |
| Watermelons | Apr 1 – June 30 | Seed | 90-100 |
MARSHALL HINSLEY is a writer and photographer who lives with his wife on a 40-acre farm south of Dallas. With a passion for growing sweet, vine-ripe specialty melons, he's also a sustainable farmer whose mission is to grow food crops in a way that improves the ecosystem and benefits wildlife as well.
- Marshall HInsleyhttps://www.edibledfw.com/author/mhinsley/
- Marshall HInsleyhttps://www.edibledfw.com/author/mhinsley/
- Marshall HInsleyhttps://www.edibledfw.com/author/mhinsley/
- Marshall HInsleyhttps://www.edibledfw.com/author/mhinsley/


